Whether you’re spawning into a fresh world or just want a quick shelter before nightfall, building easy Minecraft houses doesn’t require architectural genius, just solid fundamentals and a game plan. The difference between a thrown-together dirt hut and a respectable home comes down to knowing what works, what materials to grab first, and how to layer designs without overthinking it. This guide walks you through eight proven house builds that range from absolute beginner-friendly to surprisingly polished, each designed to be completed in a single play session. You’ll learn material priorities, layout tricks, and decoration techniques that transform basic structures into homes you actually want to live in, whether you’re playing survival mode on Java, Bedrock, or any other platform.
Key Takeaways
- Easy Minecraft houses are built on fundamentals like material priorities, layout design, and decoration techniques—not architectural expertise.
- Starting with abundant, farmable blocks like wood and stone accelerates your build process while allowing you to learn the game’s material hierarchy naturally.
- Breaking up blank walls with windows, trim, and contrasting block types is the most critical detail that separates finished homes from abandoned shelters.
- Simple designs like the dirt box, wooden cottage, and tower house can be completed in 5–45 minutes and serve as functional bases for larger projects.
- Good lighting, clear entrances, proportional doors, and minimal decoration transform basic structures into homes worth displaying.
- Focus on finishing your first build rather than perfecting it—completion builds confidence and teaches you what works in your next design.
Why Building Houses Matters in Minecraft
A house in Minecraft isn’t just a spawn point, it’s your first real investment in world progression. Early shelter protection against mobs, storage space for loot, and a crafting station for gear upgrades. Beyond pure survival mechanics, your build becomes the hub of your base designs and sets the tone for everything you construct later.
Related articles


Morale matters too. Spending 30 minutes in a dark cave with nothing to show for it kills momentum. Building a house, even a simple one, gives you tangible progress. You’ve got a bed, a furnace, and somewhere safe to store your pickaxe. That’s a win. It also forces you to gather resources intentionally: wood, stone, maybe glass. You’re learning the game’s material hierarchy without realizing it.
The psychological difference between “I have a base” and “I’m just surviving” is massive in Minecraft. A house anchors you to a location, encourages exploration from a fixed point, and gives you reasons to build bigger projects nearby. Small bases often grow into sprawling estates because the initial structure proved so satisfying.
Essential Materials for Beginner House Building
Before you start any minecraft house builds, stock the right blocks. Your material choices determine build time, difficulty, and final appearance. The rule is simple: prioritize farmable, abundant blocks that you can gather in the first few hours.
Best Wood Types for Easy Builds
Wood is your starting material. It’s everywhere, renewable, and forgiving if you mess up, just place another block and adjust. Oak wood and birch wood are classic defaults, but they differ subtly. Oak reads “cozy” and works with most terrain. Birch is brighter, better for modern builds, and stands out in forests. Spruce wood fits mountain or cold biomes perfectly and pairs well with snow for stark, clean aesthetics.
Don’t overthink wood type. Grab whatever’s nearest. Most minecraft house ideas succeed with a single wood type for walls, so consistency matters more than novelty. Mix wood types for accents once you’re comfortable, trim, frames, or roof details.
Stone and Brick Basics
Stone blocks bridge the gap between wood and more advanced materials. Cobblestone is instant, mine any stone with a pickaxe. Stone bricks require smelting, but they look sharper and fit planned builds better. Deepslate and deepslate bricks arrived in recent updates and work great for modern aesthetics or underground bases.
Base your foundation and lower levels on stone. It reads as sturdy, prevents wood from looking flimsy, and makes roofs feel grounded. A wood-on-stone cottage feels intentional. Wood on dirt feels accidental. Stone also resists fire, which matters near furnaces or lava, a small detail that saves hours of rebuilding.
The Dirt Box: Your First House Design
Before we get to anything fancy, let’s talk about your actual first shelter. The dirt box isn’t a joke, it’s the smart survival move that gets you to dawn.
Dig a hole, cover it, place a bed, light a torch. Done. You’re alive. That’s the baseline.
If you want to upgrade it slightly without adding 20 minutes of work: make the hole 3×3 blocks, build dirt walls 3 blocks high, and add a simple door frame (1 block wide, 2 blocks tall). Slap a flat dirt roof on top. Congratulations, you’ve built one of the easiest minecraft house ideas that actually functions. Add a crafting table and furnace inside, and you’ve got a full survival base.
The dirt box teaches core lessons: doors keep mobs out more effectively than you’d think, torches prevent spawning, and a roof doesn’t have to be artistic, it just has to exist. Many players dismiss this design, but speedrunners and hardcore veterans know the dirt box is the fastest path from panic to safety. It’s also endlessly moldable. Once you’re not getting ambushed at 2 AM, you can build outward, add wings, replace materials gradually. The foundation (literally) doesn’t matter if the core works.
Estimate 5-10 minutes for a functional dirt box. No timer needed.
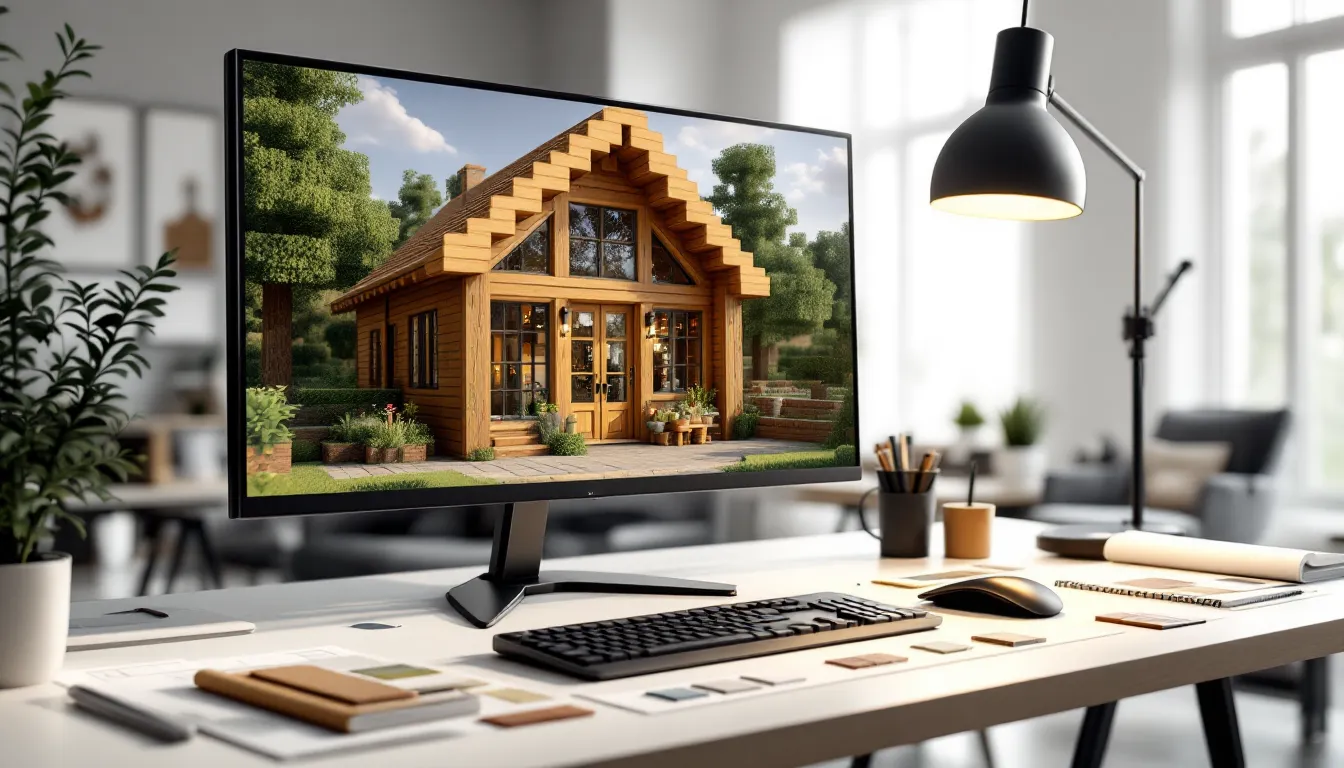
Classic Wooden Cottage for Intermediate Players
Now we’re building something you’d actually show off. The wooden cottage is the midpoint between survival shelter and statement architecture. It’s the most popular minecraft house inspiration because it looks intentional and cozy without demanding late-game resources.
Start with a 7×7 or 8×8 footprint. Build walls 4-5 blocks high using your primary wood (oak, birch, or spruce). Add a door on one side. That’s your shell.
Roof Design Tips
The roof makes the cottage. A flat roof reads boring. A gable (peaked) roof takes 5 more minutes and looks 10 times better. Here’s the quick method:
Build your walls up to your target height. At the top, place one row of wood stairs facing inward, this creates the peak slope. Then cap the ridge with a single row of wood slabs or regular blocks. If your cottage is 8 blocks wide, you’ll have a 4-block tall peak. Stairs and slabs give the illusion of depth and effort without actual complexity.
Variation: alternate wood types in the roof. If walls are oak, use dark oak stairs for shadows. The contrast makes the roof visually interesting without adding blocks or time.
Adding Windows and Doors
Windows break up blank walls and let light in. Glass panes are better than glass blocks because they don’t have that chunky gridded look. Place them in patterns, don’t just scatter them randomly. Two windows per wall side feels balanced on an 8-block cottage. Pair panes with dark oak or spruce wood frames (one block of trim around the opening) for definition.
Doors matter aesthetically too. Upgrade from a basic oak door to a dark oak door or spruce door to match your roof. If your cottage is birch, use a birch door. Small consistency wins.
Interior: leave 6×6 of open space for a bed, crafting table, furnace, and chest. You don’t need more for a functioning base. The remaining corner can be storage if you want, but simplicity is the point. You can always expand later.
Modern Minimalist Home Build
If cottages feel too rustic, try the modern minimalist home. This design flatters any biome and looks intentionally sleek, not lazy. The aesthetic relies on clean lines, tall walls, and intentional negative space.
Build a rectangular footprint (10×8 minimum). Use stone bricks or dark prismarine for walls. Go tall, 6 or 7 blocks minimum. Avoid busy details: every block should have a job. A single strip of white concrete or light gray concrete as a horizontal band across the middle breaks up the monotony.
Roof: forget gables. Go flat with a slight overhang (one block extends beyond the wall). This reads modern instantly. If flat feels too plain, try a copper roof, copper blocks oxidize over time in Minecraft, creating a patina effect that looks intentional and ages naturally. It’s a single design choice that looks professional.
Doors and windows: use oak trapdoors as horizontal window frames. Stack them in grids. It’s an unorthodox technique, but it works. Or use iron bars instead of glass panes for an industrial vibe.
Interior: open floor plan. Separate spaces with oak slabs or dark oak slabs as room dividers instead of walls. Keep furniture minimal. A bed, crafting area, furnace, and storage. Modern homes work because they’re empty by design, not because they’re small. The space feels intentional.
Time estimate: 30-45 minutes. Worth it if you want something that feels grown-up without the fantasy theme.
The Cozy Underground Base
Underground bases solve a practical problem: you don’t need to hunt for building blocks. You’re standing in them. Underground bases are also some of the easiest minecraft house ideas because they’re contained, protected, and forgiving about aesthetics. A rough-hewn cavern becomes a finished base through smart lighting and simple decor.
Find a large cave or dig a chamber 12×12×5 blocks (or bigger if you prefer). Don’t overthink shape. Irregular walls read more natural. Smooth out the floor with stone or deepslate.
Efficient Layout and Storage Solutions
Divide your base into zones. Entrance tunnel leads to a main chamber (sleeping, crafting, furnaces). Side tunnels branch to storage, mining prep, or a farm. Keep pathways 3 blocks wide minimum, tight corridors feel claustrophobic.
Storage is critical underground. Use dark oak wood or spruce wood to frame alcoves in the walls. Build storage alcoves 2 blocks deep, 2 blocks wide, and line them with double chests. This creates a clean storage wall without eating precious floor space. Label each chest with item frames on top so you know what’s inside at a glance.
Lighting: this makes or breaks an underground base. Lanterns (hanging from chains attached to the ceiling) look better than torches and provide just enough light without being blinding. Sprinkle them every 6-8 blocks. Mix in a few soul lanterns for subtle color variation.
Security: a heavy door at the entrance (spruce or dark oak) prevents mobs from stumbling in. An interior airlock (two doors with space between) is overkill but useful if you plan long sessions, you won’t accidentally let mobs in when entering.
Time estimate: 45-60 minutes to set up. You’re not building for show: you’re building for function. Ugliness is forgivable if the layout works and mobs can’t spawn.
Beyond Blocks: How Server Performance Shapes Modern Minecraft Worlds if you’re playing on multiplayer servers, hosting quality affects how smoothly these underground systems perform in survival mode.
Coastal Beach House Design
Beach biomes are underrated for builds because sand is abundant and water is already there. A beach house takes advantage of scenery instead of fighting it.
Build on stilts over water. Use oak wood or birch wood for a tropical feel. Pillars are simple: place vertical logs 4-5 blocks above the water line, then build a platform (3-4 blocks deep) connecting them. This is your foundation.
Walls on stilts: 6 blocks high, with generous window spacing. Water views should be maximized. Use wood slabs for interior flooring, it’s drier than soul sand and works aesthetically. Consider a balcony on the water side: extend the platform 2 blocks and add a railing (fences or dark oak fence) for safety and style.
Roof: gable or flat, either works over water. Light colors (white concrete, sandstone, pale oak) reflect the beach vibe. Avoid dark roofs: they feel too heavy.
Interior: keep it sparse. Bed, crafting table, furnace, storage. The view is the decoration. Add potted plants (flowers in pots) on the balcony. Place lanterns hanging from the railing at dusk. This is a seasonal house, almost a vacation spot, it shouldn’t feel like your main base.
Bonus: a dock extending from your stilts. Simple wood platform with a small area to sit and fish. It adds nothing mechanically but adds everything aesthetically.
Time estimate: 30-40 minutes. Beginner-friendly because water is forgiving and stilts are just stacked logs.
Desert Inspired Build Guide
Desert biomes offer sand, sandstone, and nothing else, which sounds limiting until you realize that constraint forces creativity. A desert-inspired build uses warm tones and adobe-style architecture naturally.
Foundation: use sandstone blocks (not regular sand). Build a 9×9 square or rectangular footprint. Walls 4-5 blocks high. The pale tan color reads instantly as desert.
Details that make it work: add red terracotta or orange terracotta accents in horizontal stripes (one row every 2-3 blocks). This mimics adobe brick layering. Use sandstone stairs for the roof, they create a gentle slope that fits the aesthetic and takes minimal effort.
Interior layout: similar to cottages, but add a middle room divider with a doorway. Two rooms feel more intentional than one large box. Keep furniture minimal: deserts should feel open.
Windows: use sandstone slabs as frames instead of wood. It’s cohesive. Pair slabs with glass panes.
Exterior feature: a small sand garden outside the entrance. Not a farm, just sand with a few cactus plants and a lantern pole. Instant atmosphere.
Alternative: if desert feels too monochromatic, steal blocks from a nearby savanna biome. Acacia wood (warm orange) looks stunning against sandstone and breaks up the tan monotony. A small acacia-trimmed structure nearby (storage shed, animal pen) creates visual rhythm.
Time estimate: 25-35 minutes. Fast because sandstone is simple to work with and the aesthetic forgives imperfection.
Quick Tower House for Limited Space
When space is precious, you’re on an island, in a crowded server, or just want maximum function in minimal footprint, a tower house solves it. Vertical building looks impressive and uses 5×5 or smaller ground space.
Build up, not out. Start with a 5×5 footprint. Go 8-10 blocks tall. Walls are just the frame, use your primary wood. Interiors split into levels: ground floor (crafting, furnace), second floor (storage), third floor (bed, final touches).
Rotate the wooden frames between floors: if ground floor walls face north-south, second floor walls face east-west. This isn’t necessary mechanically, but it looks intentional and breaks up the stripe pattern.
Roof: keep it simple on a tower. A pitched top or even just a platform works. Avoid oversized roofs on small structures, they look cartoonish.
Windows: vertical stacks of windows every level. Two per side minimum. This gives each floor light without making walls look like swiss cheese.
Exterior: add a small porch or landing on one side. A 2-block wide platform with a railing creates a landing that’s pure style, it doesn’t add much function, but it makes the tower read as deliberate architecture instead of a glorified pillar.
Time estimate: 20-25 minutes. The fastest respectable build. Pairs perfectly with surrounding structures, towers work as watchtowers, decorative elements, or standalone homes.
Common Beginner Mistakes to Avoid
Even simple designs fail if you ignore these patterns. Watch for them in your own work:
Blank walls. Large unbroken walls look unfinished. Break them with windows, trim, or varied block types. A single row of different blocks (sandstone on oak, for example) across the middle fixes this instantly.
Floating roofs. Roofs need support or visual weight. If your walls look thin (one block wide), your roof looks like it’s hovering. Solve this by adding eaves (roof overhangs) or thickening walls with trim blocks.
Tiny doors. A door frame should feel proportional. On a 3-block tall wall, a single door looks right. On a 5-block wall, add a second door or make the door frame taller. It’s a small detail, but it’s how your brain judges if a building looks “right.”
Bad lighting. Ugly interiors drive people out of otherwise great builds. Place torches or lanterns in every room. For outdoor areas, string lanterns on chains above pathways. Light is cheap and pays dividends.
Single-color everything. Wood walls + wood roof + wood door = monotonous. Break the monotony with a contrasting trim (stone, concrete, or darker wood). Even one strip of different material makes the build look intentional.
No clear entrance. Visitors (or just you, returning after a break) should know immediately where the door is. Use a porch, pathway, or subtle frame to draw the eye to your entrance. Nothing fancy, just visual hierarchy.
Storage chaos. Chests crammed randomly inside destroy any build’s vibe. Designate a storage room or corner. Use item frames on chests to label them. Organized storage looks intentional and professional, messy storage looks like you’re hoarding.
Most of these aren’t about skill: they’re about awareness. Scan other players’ work, game guides on Twinfinite showcase completed builds that nail these details. Study what reads as “finished” versus “abandoned” and copy that instinct.
Decorating Your House: Final Touches
A finished base has structure: a decorated base has personality. These final touches elevate any minecraft house from “functional” to “showcased.”
Exterior details: place flower pots (flowers planted in clay) near the entrance. Add a small crafting table outside if your theme allows (it suggests activity). String lanterns from the roof on chains or hang bells to create a festive mood. Avoid overdoing it, three exterior details feels right: ten feels cluttered.
Interior atmosphere: add a painting or two (hang them on walls using rightclick). Place bookshelves for aesthetic wood placement. A decorative door in a corner (one that goes nowhere, just for looks) adds character. Use stairs and slabs as seating arrangements near windows, they’re cheap and work.
Vegetation: place potted plants in corners and on shelves. Azalea trees fit most aesthetics. A single flowering azalea potted indoors looks sophisticated. Use hanging plants (vines, dripleaves) cascading from ceiling corners for vertical interest.
Rugs and pathways: use contrasting blocks to create floor patterns inside. Alternate dark oak wood slabs with oak wood blocks for a subtle checker pattern. Outside, create a stone path leading to your door using stone blocks or gravel in a 3-block-wide trail.
Lighting balance: interiors should be bright but not blinding. Aim for 4-5 light sources per room (torches, lanterns, glowstone). Vary placement, don’t grid them out. Place one lantern in a corner, one torch on a wall, one glowstone hidden behind a shelf for mood. Asymmetry reads natural.
Scale and proportion: ensure decoration matches build size. A tiny cottage doesn’t need five paintings and ten plants, it’s overcrowded. A large modern home can absorb more detail. Let the space breathe.
Decoration shouldn’t take more than 10-15 minutes. If you’re overthinking it, you’re overdoing it. Stop when the space makes you want to stay inside.
For deeper decoration inspiration, Game8 has detailed guides on building and decorating bases across different styles. GamesRadar+ also provides comprehensive Minecraft building guides with visual walkthroughs if you want exact placement references.
Conclusion
Easy Minecraft houses don’t have to look like placeholder shelters. With the right material choices, proportions, and thoughtful decoration, a 30-minute build becomes a base you’re proud to call home. Whether you’re starting with a dirt box, upgrading to a wooden cottage, or building something as ambitious as a beach house or underground base, the fundamentals remain: clear entrances, balanced walls, roofs that match their walls, and lighting that makes interiors livable.
The eight designs here range from ultra-beginner friendly to genuinely impressive, but they all share one trait: simplicity is a feature, not a limitation. Each can be completed in a single session and expanded later without rebuilding. Your first house won’t be your last, it’s the foundation (architecturally and literally) for everything you’ll build next.
Start with whichever style speaks to your current biome and skill level. Focus on finishing it rather than perfecting it. Once you’ve got one solid build under your belt, you’ll recognize patterns in better builds, steal ideas, and develop instincts about what works and what falls flat. That’s how you go from building easy Minecraft houses to building the sprawling bases you actually want to show off.